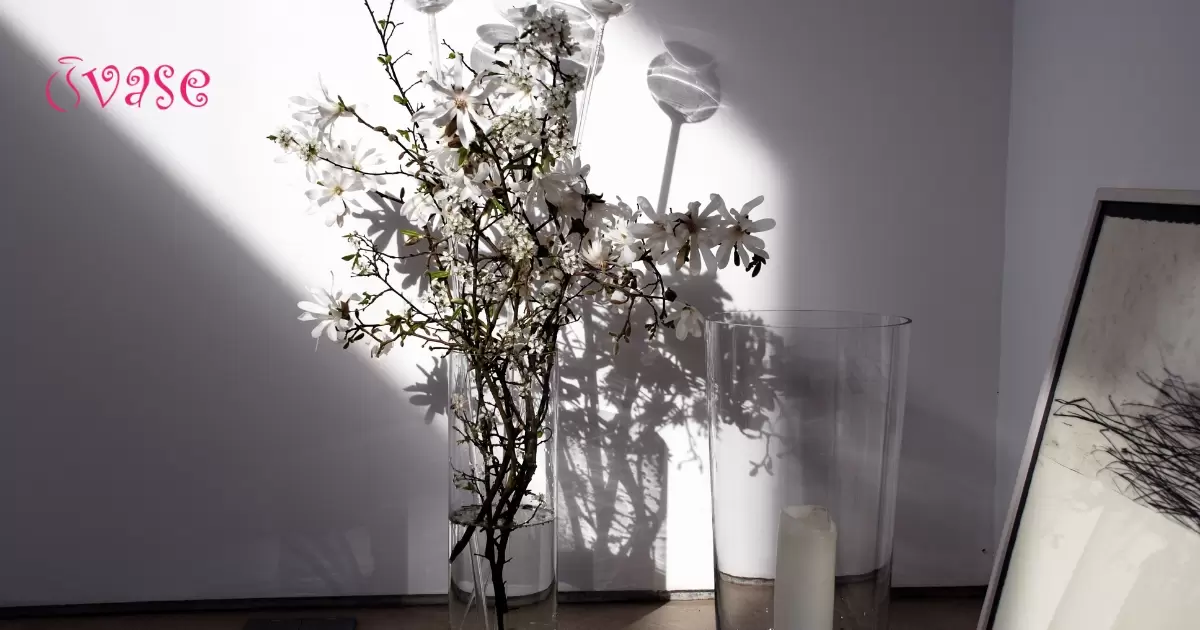
Arranging tall branches in a striking vase display can be an elegant and artful way to bring natural elements into your home decor. The height and slender nature of branches make them uniquely suited for displaying in tall vases to make a statement.
When done properly, an arrangement of branches can transform an ordinary vase into a dramatic focal point. With some simple techniques and commonly available materials, you can create dazzling branch arrangements that will complement any style.
Branches work well in tall vases. Their height and slim shapes stand out. Choose interesting branches and a vase with flair. Take time to style branches for maximum impact.
Materials You'll Need
Before you start crafting your tall branch arrangement, make sure you have the necessary supplies on hand.
Branches: Look for hardy branches around 1 to 3 feet tall. Evergreens like cedar and pine or trees that bloom early like magnolia, quince, and crabapple are good options. Gather 8-12 branches in varying heights and widths for flexibility.
Floral foam: Choose a tall brick or cone-shaped piece of foam. Soak it thoroughly before inserting it into the vase to anchor the branches.
A tall, narrow vase: Select a vase at least 15 inches high with a narrow opening so the foam sits snugly and is concealed. Discover how to clean glass vases with narrow necks. Clear glass or colored vases both work well.
Clippers and a paring knife: Use pruning shears for harvesting longer branches and a paring knife to strip off buds or peel bark for an aged look.
Embellishments: Elements like flowers, moss, lichens, or lights can enhance your finished arrangement.
Prepare and Condition the Branches
Before arranging the branches, take some time to prep and condition them for longevity.
- Trim the stems cleanly with sharp bypass pruners. Remove any thorns or undesirable side branches.
- Consider stripping bark off some stems for a natural driftwood aesthetic. A paring knife helps remove bark cleanly.
- Split thick woody stems an inch or so up the stem. This allows more water intake through the cut end.
- Use warm water or commercial floral preservatives to soak the branches for at least one hour before arranging. This hydrates and prolongs viability.
- Conditioning the branches before arranging them will help keep your finished arrangement looking fresh for longer.
Craft the Tall Branch Arrangement

Once your vase, foam, and branches are prepped, it's time for the fun part—creating your display. Follow these steps.
|
Step |
Instructions |
|
Insert Tall Stems First |
Start by inserting the tallest, most prominent branches in a triangular shape. Vary heights for visual interest. |
|
Fill In With Shorter Stems |
Surround the central tall stems with smaller branches of different widths and textures. |
|
Incorporate Decorations |
Intermingle decorative elements throughout like flowers, lichens or lights. |
|
Adjust and Perfect |
Tweak stem angles and trim excess foliage to achieve the look you want. |
|
Maintain Over Time |
Check water level often. Trim dying buds and reposition bending stems. |
The key is to take the time to thoughtfully place each stem while keeping proportions and silhouettes in mind. Play around with the arrangement until you love how it looks.
Tips for Maintaining Your Finished Arrangement
Caring for your finished tall branch arrangement requires just a bit of regular tending.
- Check water levels often and replenish with clean, room-temperature water. Replace entire contents weekly.
- Consider adding commercial floral preservative solutions to the water to nourish and prolong viability.
- Gently bend flexible stems back into position as needed to maintain the arrangement's integrity.
- Snip off any buds that open or die greenery. This keeps the focus on the striking branch shapes and lines.
Creative Ideas and Inspiration
Looking for more ideas on how to make your tall branch arrangement unique? Consider these creative embellishment options.
- Dye branches or the water, an on-trend color using commercial dyes or food coloring for a pop of color.
- Incorporate Art Deco inspiration with handmade paper or metallic elements interspersed throughout.
- Create seasonal magic with warm white string lights and natural elements like pinecones, curly willow, or red-twig dogwood around the holidays.
- Allow some reed grasses to gracefully arch out of the vase opening for a windblown effect.
- Nestle air plants amid the branches rather than cut flowers for easy care greenery.
The possibilities are endless when it comes to personalizing your display. The most important tip is to embrace your vision and get creative with how you arrange and embellish the branches.
Frequently Asked Question
How do you arrange a vase with branches?
Arrange branches by cutting them at different lengths for visual interest.
How tall should branches be in a vase?
Branches should be slightly taller than the vase for a balanced look.
How do you fill a tall vase?
Fill tall vases with decorative elements like stones or beads.
What to do if a vase is too tall?
If a vase is too tall, add filler material at the bottom for stability.
Conclusion
Arranging branches makes a statement. Select interesting branches with flair. Prepare them by trimming and stripping the bark. Insert branches artfully in foam-anchored vases. Embellish your creation with decorations. Customize the look to suit your vision.
Maintaining the arrangement takes little work. Check and change the water weekly. Gently reposition the bending stems. Snip off any dead greenery over time. Add floral food to the water for nutrition. Check water levels and replenish often. Beautiful, unique branch arrangements are simple to create and maintain.