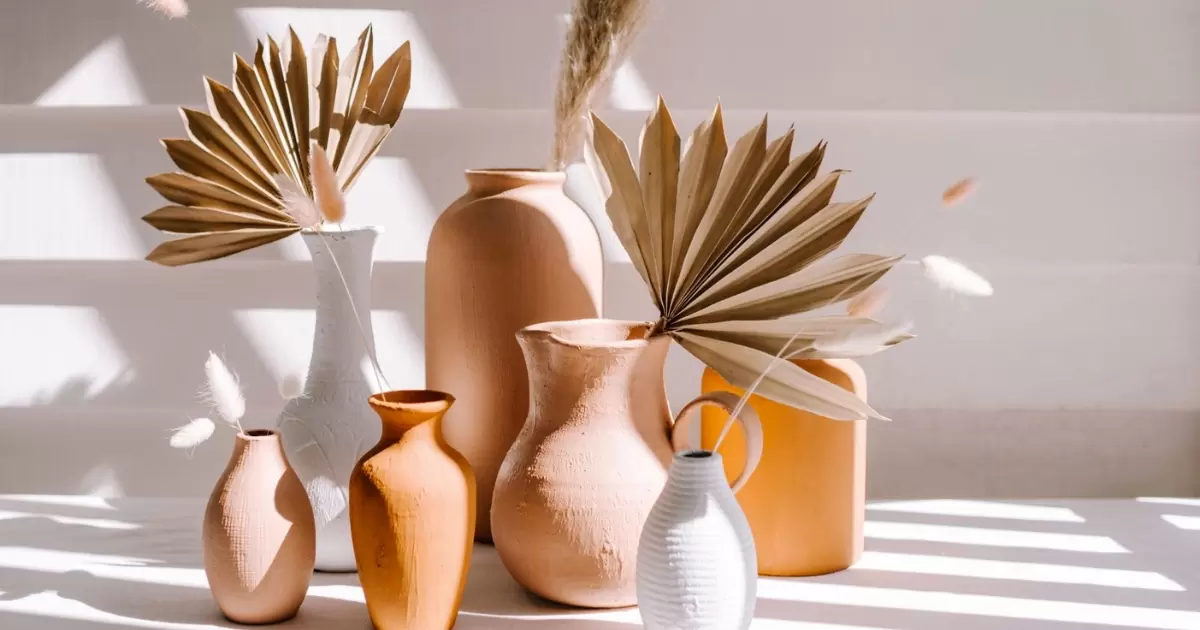
Terracotta is a classic material that has been used for pottery and vases for thousands of years. Known for its orange-red hue and natural clay texture, terracotta makes beautiful, earthy home decor. While authentic terracotta vases can be pricey, the good news is you can easily make your own at home with simple supplies.
Terracotta vases add rustic charm to any space. But store-bought ones come with high price tags. Learn how to make your terracotta vases on a budget. With simple supplies and following basic steps, you can make custom vases to display around your home.
Creating your terracotta vases is a fun DIY project. It allows full customization at a fraction of the cost of store-bought vases. You can sculpt any shape and decorate it with unique patterns and colors. The process only requires simple, affordable supplies. And it can be done even by beginners with no prior experience working with clay.
Benefits of DIY Terracotta Vases

Making your own terracotta vases has many advantages.
- Cost savings
Buying supplies and tools to make multiple vases yourself is cheaper than purchasing finished terracotta vases. You can make several vases for less than the price of one pre-made vase.
- Customization
You can sculpt any shape you want and decorate it with unique patterns and colors. Add handles, textures, cutouts - get creative! Premade vases lack this personalized touch.
- Creativity
It's a great outlet to express your creativity and make meaningful homemade gifts. The possibilities are endless when you DIY terracotta vases.
- Beginner-friendly
The process is simple enough for even those new to working with clay. As long as you follow the steps, anyone can achieve success.
- Satisfaction
Completing a DIY project provides a sense of personal accomplishment. You'll feel proud showing off the vases you made yourself.
Supplies Needed
you don't need any fancy tools or artistic skills to DIY terracotta vases. The basic supplies include.
- Terracotta clay: This natural earthen clay is readily available at craft stores. Look for clay that doesn't require firing or baking.
- Water: To condition the clay to make it flexible. You'll just need clean water in a small bowl or spray bottle.
- Rolling pin: For rolling clay into slabs or cylinder shapes. Any basic rolling pin will do.
- Sculpting tools: Popsicle sticks, toothpicks, etc. for shaping details. You can improvise with household items.
- Acrylic paints and brushes: For decorating the finished piece. Craft paints offer many color choices.
- Sealant: To waterproof the final vase. Polyurethane, epoxy resin, and Mod Podge all work.
- Surface for working: A smooth table or countertop provides an ideal work surface. Cover with wax paper.
- Container for storing unused clay: Store any unused clay in an airtight container or plastic bag.
Step-by-Step Instructions
Follow these simple steps to craft your terracotta vase.
Condition the Clay
To make an air dry clay vase, the terracotta clay must first be conditioned. Soak the clay in water briefly, then knead it for 5–10 minutes, adding water as needed, until smooth and pliable. Properly conditioned clay won't crack when shaping your handmade air-dry clay vase.
Knead the clay for 5–10 minutes, using your palms to massage the clay in a folding motion, until it is smooth, uniform, and flexible. If the clay starts to dry out while kneading, re-wet it as needed. Properly conditioned terracotta clay should be workable and not crack when shaping your vase.
Shape the Vase
Once conditioned, the clay is ready to be formed into a vase shape. There are a few options.
- Round vase: Roll clay into a cylinder shape, adding height as desired. Leave thick walls for stability.
- Square vase: Use a rolling pin to flatten clay into a square slab about 1/4-inch thick. Shape the slab into a box, joining edges with water.
- Freeform shape: Sculpt clay into any shape, using your hands and sculpting tools. Make indents, ruffles, or coils.
- Basic shape first: Start with a basic cylinder or square shape, then refine details after.
Refine the shape by tapering the neck and base, and smoothing all edges. Allow time for clay to partially dry and firm up between steps.
Add Details and Textures

Once you have the basic vase shape made, you can add creative details and textures. Press designs into the clay using stamps, stencils, or tools to make patterns like geometry, leaves, or flowers. Pinch and sculpt the clay by hand to create coils, ruffles, and other textures.
Attach rolled clay handles to the sides to make a handled vase, blending the edges smoothly. Use cookie cutters to cut out shapes from clay and attach them to the vase surface, securing the joins. Incise patterns into the clay with toothpicks, skewers, or other sharp tools. After adding textures, let the vase dry so the details remain visible.
Decorate
For a more polished look, you can decorate your finished terracotta vase with paint. Use acrylic craft paints once the shaped clay is fully dry, as acrylics work best on natural clay. Try geometric patterns, images, dots, stripes, and flowers, or leave some sections unpainted.
Add color to existing textures. Use painter's tape to get clean edges and stripes. Outline painted areas with black acrylic paint for definition. Let the acrylic paint cure 24-48 hours before sealing to prevent smearing.
Seal the Vase
The final step is applying a sealant like polyurethane, ModPodge, or epoxy resin to waterproof the vase so it can hold plants or flowers. Make sure the surface is clean before sealing, and do 2-3 thin coats to prevent drips.
Fully cured acrylic paint needs 2-3 coats of sealant, while bare terracotta may need up to 5 coats. Allow full drying time between coats, testing for tackiness before adding more. ModPodge provides a glossy finish, while polyurethane and epoxy give a smooth, clear coat. Once sealed, add your favorite flowers to the vase and enjoy your handmade terracotta project!
Tips for Making Terracotta Vases

Follow these tips for getting the best results on your DIY vases.
- Work on a smooth surface like wood or marble for easy rolling and shaping. The wax paper helps prevent sticking.
- Keep clay moist by misting water while sculpting to prevent cracking. Don't let it get too wet.
- Allow several hours for air drying between steps. Drying time depends on the vase thickness.
- Use painter's tape for crisp paint lines and patterns. Remove before sealant application.
- Apply sealant in a well-ventilated area and allow to fully cure before use. Dry for the recommended time.
- Photograph your process to remember the techniques for future projects.
- Start with inexpensive terracotta clay in case mistakes happen while learning.
- Have fun and don't fret over perfection! Handmade items have an irresistible charm.
Inspiring Design Ideas
Need some inspiration for your DIY terracotta vases? Here are unique ways to make your vases stand out.
Modern Geometric Patterns
- Paint bold geometric shapes like triangles, circles, and diamonds.
- Try a trendy minimalist black-and-white color palette.
- Outline the patterns in black for definition.
Boho Chic Style
- Imprint the clay with burlap, lace, or leaves for natural textures.
- Use a neutral tan or terracotta clay base.
- Paint on freehand floral designs in bright colors.
Rustic Ruffles Vase
- Sculpt ruffled coils around the vase vertically or in waves.
- Leave the clay natural or stain with tea for an antique look.
- Accent with jute twine tied around the vase middle.
Metallic Gold or Silver
- Coat the vase in metallic acrylic paint like gold, silver, or copper.
- Try crackle finishing spray over top for an aged effect.
- Use a round vase shape for modern glam.
Ombre Rainbow Brights
- Paint the vase in ombre shades fading from bright to pastel.
- Try bold rainbow colors or soft sunset shades.
- Use lots of blending while the paint is wet.
Frequently Asked Question
What type of clay is best?
Natural terracotta clay works well. Avoid polymer clays that require baking.
How long does it take?
With drying time, the entire process can take 1-2 days. Actual hands-on time is just a few hours.
How do I get smooth finishes?
Use plastic sculpting tools and a little water while shaping for seamless surfaces. Baby wipes can smooth too.
What if the clay cracks?
Kneading longer conditions the clay properly to prevent cracking. Allow more drying time between steps.
Conclusion
Making your terracotta vases is simple. With some basic supplies and following easy steps, anyone can create custom vases. Shape, decorate, and seal clay to make one-of-a-kind vases. Show off your artistic talents by giving handmade vases as gifts. Or display them around your home for beautiful, earthy decor.
Follow this tutorial for satisfying do-it-yourself projects. Unleash your creativity with terracotta clay. Sculpt any shape and design imaginable. The possibilities are endless when you DIY terracotta vases yourself. Personally, crafting vases is enjoyable, affordable, and achievable for beginners. Let your unique style shine through handmade terracotta vase creations.