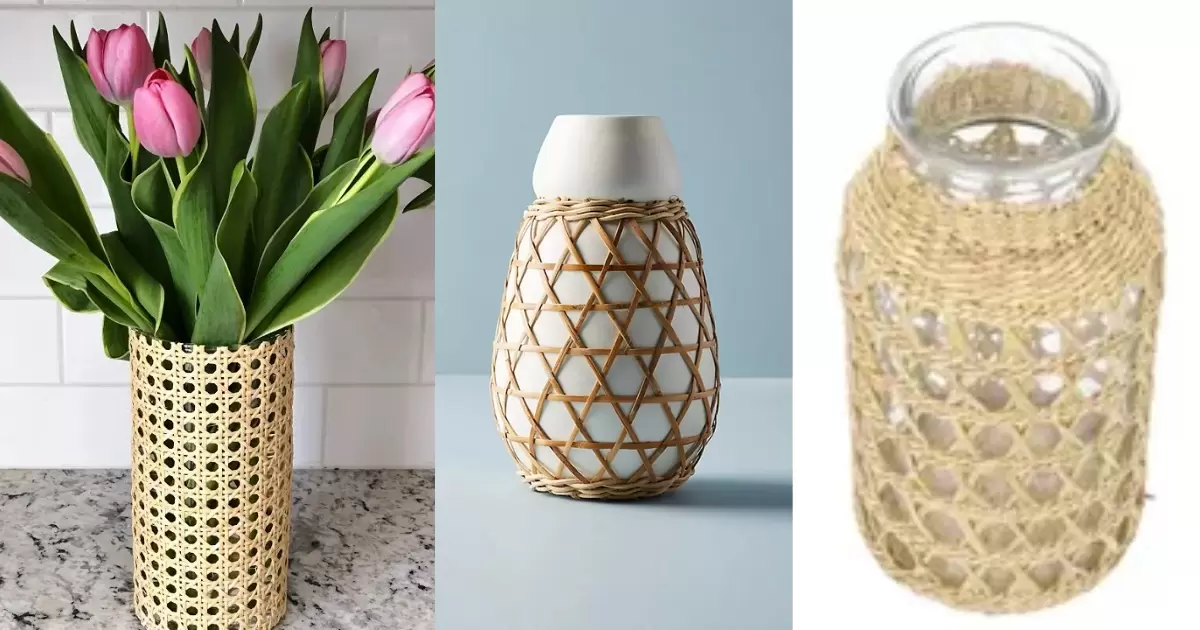
To make your own hand-built ceramic tall vase, start by wedging clay to remove air bubbles. Roll out a slab of clay and cut it to the desired size for your vase. Then, wrap the slab around a cylindrical form, like a PVC pipe, to create the vase shape. Smooth the seams and shape the vase with your hands or tools.
Want to add a personal touch to your home decor? Learn how to make your own hand-built ceramic tall vase! With some clay, basic tools, and a bit of creativity, you can craft a stunning vase to showcase your style. Follow these simple steps to create a unique piece that will elevate any room.
Making your own hand-built ceramic tall vase is easier than you think! By following a few straightforward steps, you can unleash your artistic flair and craft a one-of-a-kind vase that reflects your style. Let's dive into the process and bring your ceramic masterpiece to life!
Gather Your Materials
Creating a large, hand-built ceramic vase requires surprisingly few supplies. Here is what you’ll need:.
- Clay
- Rolling pin or slab roller
- Cutting wire or knife
- Cylindrical form ( PVC pipe)
- Smoothing tools (rib, sponge)
- Kiln
- Glazes
- Brushes or applicators
Step-by-Step Instructions
Follow these steps carefully as you work the clay into your desired vase design.
Choose the Clay
To begin crafting your hand-built ceramic tall vase, the first step is to choose the clay. Opt for a clay body suitable for hand-building, like earthenware or stoneware. Consider the firing temperature and the desired finish of your vase.
Earthenware fires at a lower temperature and is often more porous, while stoneware fires at a higher temperature, resulting in a denser, more durable piece. Select the clay that best suits your project and preferences.Consider the baking soda paint faux clay vase.
Prepare the Workspace

Before starting your ceramic project, ensure your workspace is ready. Clear a sturdy table or workbench to provide ample space for rolling out clay and assembling your vase. Lay down some canvas or newspaper to catch any mess and protect your surface. Gather all your materials within easy reach to streamline the crafting process.
Roll the Clay
You've selected your clay, Now it's time to prepare it for building. Wedge the clay thoroughly to remove any air bubbles and ensure uniform consistency. Then, roll out a slab of clay to the desired thickness for your vase. Pay attention to the texture and plasticity of the clay as you work, ensuring it's easy to shape and manipulate. With the right clay and preparation, you're ready to embark on an exciting journey.
Blend the Seams
Wrapping the slab around the cylindrical form, it's time to blend the seams. Use your fingers or smoothing tools to gently press and merge the edges. Smooth out any visible seams to create a seamless surface for your vase. This step ensures a cohesive look and strengthens the structure of your ceramic creation.
Refine the Design

The vase has taken shape, it's time to refine the design. Smooth out any rough edges or imperfections using your smoothing tools. Pay attention to the overall symmetry and balance of the vase as you work. This step ensures a polished finish before moving on to the next stage.
Apply Color/Glaze
After refining the design, allow the vase to dry slowly to prevent cracking. Once dry, prepare it for the bisque firing process in the kiln. This initial firing will harden the clay and prepare it for glazing. With careful attention to detail during this stage, your ceramic tall vase will be ready to take on vibrant colors and patterns in the glazing process.
Fire and Finish

When a ceramic tall vase is dry, it's time to fire it in the kiln. Ensure the firing process is slow and controlled to prevent cracking. Once fired, let it cool before moving on to the next step. After firing, it's time to add the finishing touches to your vase.
Apply glazes using brushes or applicators to achieve your desired colors and patterns. Then, fire the vase again to seal in the glazes and complete the finishing process. Your unique hand-built ceramic tall vase is now ready to grace your space with its beauty!
Handy Tips and Tricks
Here are some additional pointers for beginners.
- Maintain a thickness between 1/4 and 1/2 inches for sufficient stability as the vase gets taller.
- Wedge clay thoroughly before beginning and keep unused clay sealed in plastic to prevent drying.
- Gently smooth coil intersections by mixing water into the clay rather than pushing hard (which can cause cracks or weakness).
- Work only on completely dry clay stages to allow full adhesion between layers and prevent sagging.
- Consider inserting a recycled object like a vase form or cardboard tube into the center for extra support if constructing an especially tall piece. Carefully remove the inner support structure before firing.
Customize Your Creation

Experiment with different techniques like layering, dripping, or sponging for unique effects. Let your imagination run wild as you transform your plain vase into a work of art. Whether you prefer bold, vibrant colors or subtle, earthy tones, the choice is yours. Personalize your vase to match your home decor or make it a statement piece that stands out on its own.
Benefits of Making Your Ceramic Vase
There are endless design options when making a handmade ceramic piece. You can stain or paint the bare clay before glazing. This adds color and depth. Try pressing textures into the clay for visual interest. Incorporate found objects by gently pushing them into the clay. Items like beads, shells or stones add uniqueness. Play with shapes to create dramatic silhouettes.
Frequently Asked Question
How do you make a clay vase by hand?
You can make a clay vase by hand using coils or slabs of clay. These pieces are blended, shaped into a vase form, dried, then fired.
How do you make a vase look ceramic?
To make a vase look ceramic, use either air-dry clay or high-fire clay, and glaze or paint it. Then seal it with gloss or varnish.
What is the hand-building technique in ceramics?
Hand-building a ceramic piece is forming it by hand out of clay coils or slabs without using a pottery wheel. Shaping, blending seams, drying, glazing, then firing are the main steps.
How do you cut a ceramic vase?
To cut a ceramic vase, first score the area to be cut with a scoring tool or knife. Then carefully tap it with pliers to break cleanly on the scored line.
Conclusion
The time invested in making a custom tall ceramic vase by hand results in a stunning focal piece sure to impress all who see it. As you experiment with clay and hand-building techniques, your satisfaction grows with each unique design.
So gather clay and tools, put on some music, and let imagination become reality, one coil or slab at a time. That feeling when unwrapping your handcrafted vase fresh from the kiln makes all the effort so rewarding. With these step-by-step instructions, you’ll impress friends and family with your own handmade ceramic tall vases in no time!